|
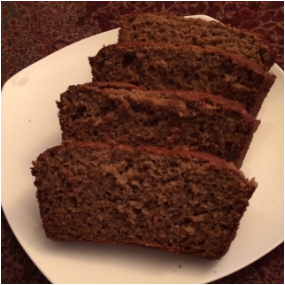
When my kids ask for seconds, I share the recipe! Today I made this for breakfast and it was so delicious. The great news is that its grain free, but it doesn't taste like it!! The texture is amazing.
Ingredients: 1/2 cup butter, softened 1/4 cup maple syrup 1 banana 4 eggs 1/2 cup tapioca flour 1/2 cup coconut flour 1 teaspoon baking soda 1 teaspoon cinnamon 1/2 teaspoon powdered ginger 1/2 teaspoon nutmeg 1 teaspoon vanilla 1/2 teaspoon salt 1/8 teaspoon powdered stevia I get my tapioca flour in the nutrition section at my local grocery store. I use Bob's Red Mill brand, but you can get it online too. I use an alcohol free vanilla. Directions: Preheat oven to 325 degrees F. Lightly grease a 1.5 quart bread pan. I use a stoneware bread pan. In a blender, add butter, maple syrup, banana and eggs. Blend. Add coconut flour, tapioca flour, baking soda and spices. Blend well. Pour into greased bread pan. Bake until a toothpick comes out clean, about 50 minutes to one hour. If you can handle waiting, allow to cool before serving. For me, not chance, I ate it HOT with butter!!
0 Comments
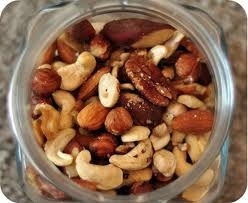
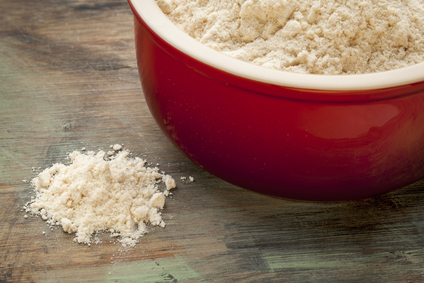
I got this great recipe from Dr. Mercola's Nutritional Typing Meal Plan. This can be used in place of gluten flour in most recipes. Combine: 1 1/2 cups coconut flour 1 cup of rice flour 1 cup of potato starch flour 1/2 cup cornstarch 1/2 cup garbanzo flour or fava flour 2 TBS xanthan gum Who doesn't LOVE cupcakes? We have been experimenting with cupcake recipes and the part that we found most challenging was finding a frosting recipe that mom approved of AND tasted good. Some of the buttercream frosting recipes call for 6 cups of powdered sugar... no thanks! So, we went to work researching and taste testing and here's what we found out. You can make GREAT cupcakes without even using flour. Both of the following recipes are for flourless vanilla cupcakes. I am posting two cupcake recipes and two frosting recipes because they are all great and give you more options in case you have allergies or prefer honey to sugar, etc...These are Paleo, gluten-free and Primal friendly cupcakes and frosting. The best part is, these are something you can make as often as you like because the ingredients are healthy! If you prefer flourless chocolate cupcakes, you can find the recipe here. Cupcake Recipes Cupcake Option 1 (I adapted this recipe from a Beyonddiet.com recipe for yellow cupcakes) Ingredients: 5 large eggs 1 large egg yolk 1/2 tsp Celtic or Himalayan salt 1 1/2 tsp baking powder (or 3/4 tsp baking soda and 3/4 tsp cream of tartar) 5 TBS coconut flour 1 - 16 ounce can white beans such as Northern or Canellini 3 TBS Rapadura (whole cane sugar) or raw honey 1/4 tsp stevia extract powder 2 tsp vanilla extract 1/2 tsp baking soda 6 TBS Spectrum Organic Shortening Directions: Preheat oven to 350ᵒ F. Line a muffin tin with baking cups. Drain and rinse beans. Add all ingredients to blender. Blend until well combined, being careful not to over blend. Spoon batter into lined muffin cups. Fill to 3/4 full as cupcakes will rise. Bake for 20 - 25 minutes. Let cool before frosting. Cupcake Option 2 I found this one in a book that I highly recommend, called Indulge and Heal: 40 Nourishing Treats Without Grains, Dairy, Nuts or Refined Sugar. Ingredients: 1/2 cup coconut flour 6 eggs, room temperature if possible 6 TBS raw honey or 3 TBS raw honey and 1/4 tsp stevia powder extract 6 TBS coconut oil or butter 2 TBS coconut milk or plain yogurt 1 tsp vanilla extract 1/8 tsp salt 1/4 tsp baking soda 1/2 tsp apple cider vinegar Directions: Pre-heat oven to 350ᵒ F. Line muffin tin with 8 baking cups. Place all ingredients in blender and blend until well combined. Use mixer, starting with eggs and coconut flour if you do not own a blender. Spoon into muffin tin filling each about 3/4 full. Bake for about 20 minutes, until golden brown and toothpick comes out clean. Buttercream Frosting (Also from Indulge and Heal which is full of great, healthy treats for the whole family) Frosting Option 1 This first one is sweetened with honey. Ingredients: 2 egg whites 6 TBS raw honey Pinch of salt 1/4 cup or 8 TBS softened butter or coconut oil (we used butter) 1/2 tsp vanilla extract Directions: Make a double broiler over a pot of gently simmering water. (Just place water in one pot, bring to a boil and turn the heat down to medium low. Add a smaller pot into the simmering water inside the larger pot.) Add to pot (the one on top with no water in it) and whisk together egg whites, honey and salt until slightly fluffy and hot to the touch. (Mine didn't appear fluffy, I just kept whisking until they were nice and hot.) The mixture should be about 140ᵒ F and will take about ten minutes. Remove mixture from heat and add to a mixing bowl. Whip mixture until barely warm. ( I mixed it until it was totally cooled off and it still worked out fine!) Add the butter 1 TBS at a time and whip on high speed until the mixture appears to separate. Be patient, this really will happen at which point it is about to become amazingly firm and creamy buttercream frosting! Use immediately or refrigerate. It will need some time to soften after being refrigerated before you frost the cupcakes. Frosting Option 2 (This one came from a wedding cake maker and is our favorite, although it does contain a small amount of organic sugar. Here's where I found it.) Ingredients: 1/4 cup sugar 1 large egg white 6 tablespoons butter, softened 1/4 teaspoon vanilla Directions: Whisk egg whites and sugar together in a double boiler over simmering water. Whisk occasionally until you can’t feel the sugar granules when you rub the mixture between your fingers. Transfer mixture into the mixer and whip until it turns white and about doubles in size. (Here’s a tip: when you transfer to the mixer, make sure you wipe the condensation off the bottom of the bowl so that no water gets into the egg whites. This can keep them from whipping up properly.) Add the vanilla. Finally, add the butter a stick at a time and whip, whip, whip. Note from author: Do not have a panic attack when this takes a while to come together (though I did every time). One super-large batch took 15 minutes, but it did and will come together. Patience, young Jedis. ( I found this to be very true, but the second time I made it, it only took about 30 seconds to separate and get creamy again!) I am a self proclaimed nut-aholic:) But, did you know nuts can be difficult to digest? Even raw nuts. So, if you have the time and want to eat nuts in a way that may be kinder to your digestive system, I invite you try making some crispy nuts. This is on the easiest recipes I make. I literally come home from the store with some raw nuts or I order them from Azure Standard (no, I don't get a commission for telling you how to save money by ordering from Azure:) ), and I throw the nuts in a bowl of water with some good salt and allow them to soak overnight. What does this accomplish? When you plant a seed in the ground, you must first water it in order for it to grow. The nut/seed has a protective coating on it that keeps if from germinating before the proper time. This coating contains enzyme inhibitors which basically keep the nutrients safe and largely unavailable for nourishment until the time comes for the seed to become a plant. When soaked, the enzyme inhibitors are washed away and the nutrition packed inside the seed wakes up and comes to life. The seed (or nut) begins to use up the fat for fuel. It becomes a living food full of live enzymes and nutrients that are readily available to the one who consumes it. Soaked nuts are much more easily digested than their un-soaked counterparts. In his book, Rainbow Green Live Food Cuisine, Dr. Gabriel Cousens includes a very helpful chart that shows how long to soak each different type of nut or seed. Seeds are smaller and generally require less soaking time, such as four to six hours. Nuts on the other hand are larger and tend to require eight to twelve hours. You can visit www.thesproutpeople.com for a great source of sprouting seeds as well as information on soaking times. When I buy nuts and seeds, I throw all the seeds in one bowl and all the nuts in another. I add a teaspoon of sole or some plain Celtic or Himalayan salt, about a teaspoon. I soak them overnight and then rinse them and put the whole batch in my dehydrator. I dehydrate them for 6 – 12 hours and then place them in Ball jars in my cupboard. This way, I eliminate the need to soak nuts too often. You can use these in trail mixes, granola, raw crackers, for grinding into flour or simply to munch on as you like. You can even flavor them before dehydrating. I like to make cinnamon toast nuts or chili lime. Just sprinkle any seasonings you like over the nuts after rinsing and before dehydrating. You can also bake them at your oven’s lowest temperature. They taste just like roasted nuts, but are far more nutrient dense. Here are two recipes for you: Crispy Nuts Basic Recipe Makes 4 cups Ingredients 4 cups raw nuts such as walnuts, almonds, pecans, macadamia, cashews or peanuts. Use organic, raw nuts for this recipe. 2 tsp salt Pure water such as filtered or spring water Instructions Place nuts and salt in glass bowl covered with after for 7 - 8 hours or overnight. I do this in the morning and dehydrate at night or soak them when I go to bed and dehydrate in the morning. Drain nuts in colander. If using a dehydrator, place nuts evenly on trays and dehydrate at 115 degrees F for about 12 - 24 hours, until fully crispy. If using an oven, spread nuts on stainless baking pan on lowest oven setting. Bake for about 12 hours or until completely crispy. Turn once in a while and watch for doneness as oven temperatures vary. Allow to cool. Store in airtight container at room temperature. Maria’s Un-Roasted Pumpkin Pie Nuts My kids beg me for these! Ingredients 2 Tablespoons Xylitol or Raw Honey (melted on low temp) 3 scoops stevia powder 2 teaspoons vanilla Liberal amount of Himalayan salt, 2 tsp - 1 TBS 2 heaping teaspoons pumpkin pie spice 2 cups soaked, raw nuts of choice, walnuts are great, soaked overnight, drained and rinsed Instructions Place soaked nuts and all ingredients in a bowl to marinate. Let sit for two hours. Place on non-stick sheet or parchment paper in dehydrator or on a cookie sheet in oven on lowest setting with the oven door left open. Dehydrate until crisp and roasted-like, 12 - 24 hours. For an amazing trail mix, combine crispy nuts with coconut flakes, dried fruit and dark chocolate chips. |
Categories
All
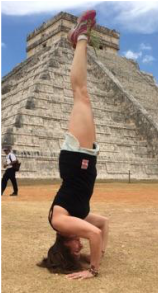
Chichen Itza, Mexico 2015
|


RSS Feed